
Posted on 2025-10-09 by Alexei Doudkine in Tools of the Trade
Every website requires you to register an account now, even when they don’t really need one. I mean, come on… Why do you need my email to deliver a pizza?
For protecting your privacy, temporary throwaway email addresses are really useful. Services like Mailinator, and Temp Mail exist and work pretty well. But they are sometimes blocked by websites and are publicly visible. So, let’s make our own!
What we’ll need
We’re going to stitch a few things together to make all this happen seamlessly:
- Cloudflare - specifically, their DNS and Email Routing services
- A domain name (this is the only thing that will cost you money)
- Slack (or similar, like Discord)
I’m going to assume you’ve already bought a domain name, and have Slack (or similar, but I’m just going to use Slack as the example from now on) ready.
Connecting your domain to Cloudflare
Cloudflare has a free tier that is enough for what we need today. Go ahead and sign-up here: https://dash.cloudflare.com/sign-up
We then have to connect our domain to use Cloudflare as the DNS provider.
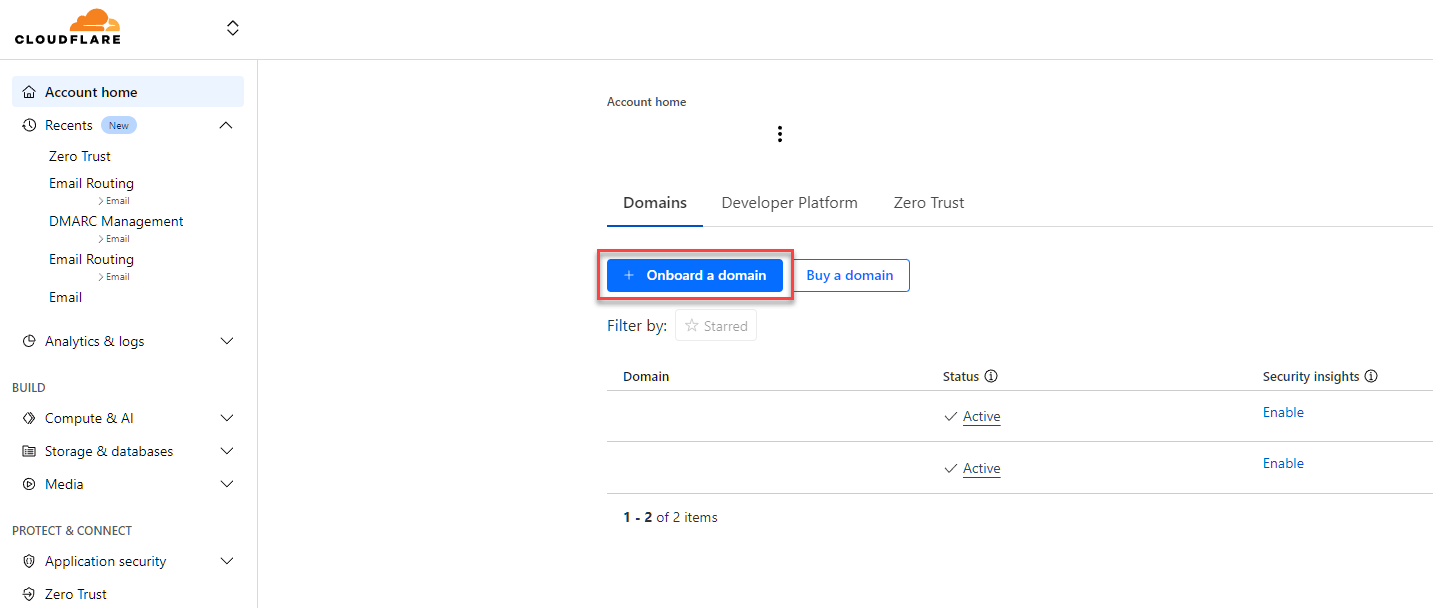
Fill in your domain name. The rest of the settings don’t matter, but I prefer manual entry for DNS records. Then, choose the Free plan. Optionally, you can then fill in your DNS entries. Finally, hit Continue to activation
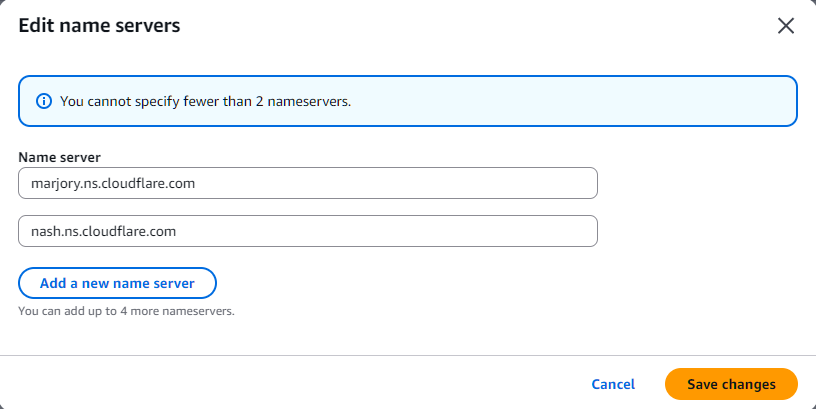
Next, you’ll need to change the nameservers assigned with your domain registrar, following the instructions from Cloudflare. I’ve used AWS Route53 for this example:
Once that’s done, back in Cloudflare, hit Continue.
And now we play the waiting game…
This can take up to a few hours. When it’s done, you’ll see a green “✅ Active” label in the top-left. For now, go grab some food, and walk your dog! I’ll see you soon.
Setting up Email Routing
Once the domain is connected to Cloudflare, we can start setting up the email side.
From the left menu, go Email > Email Routing > Get started.
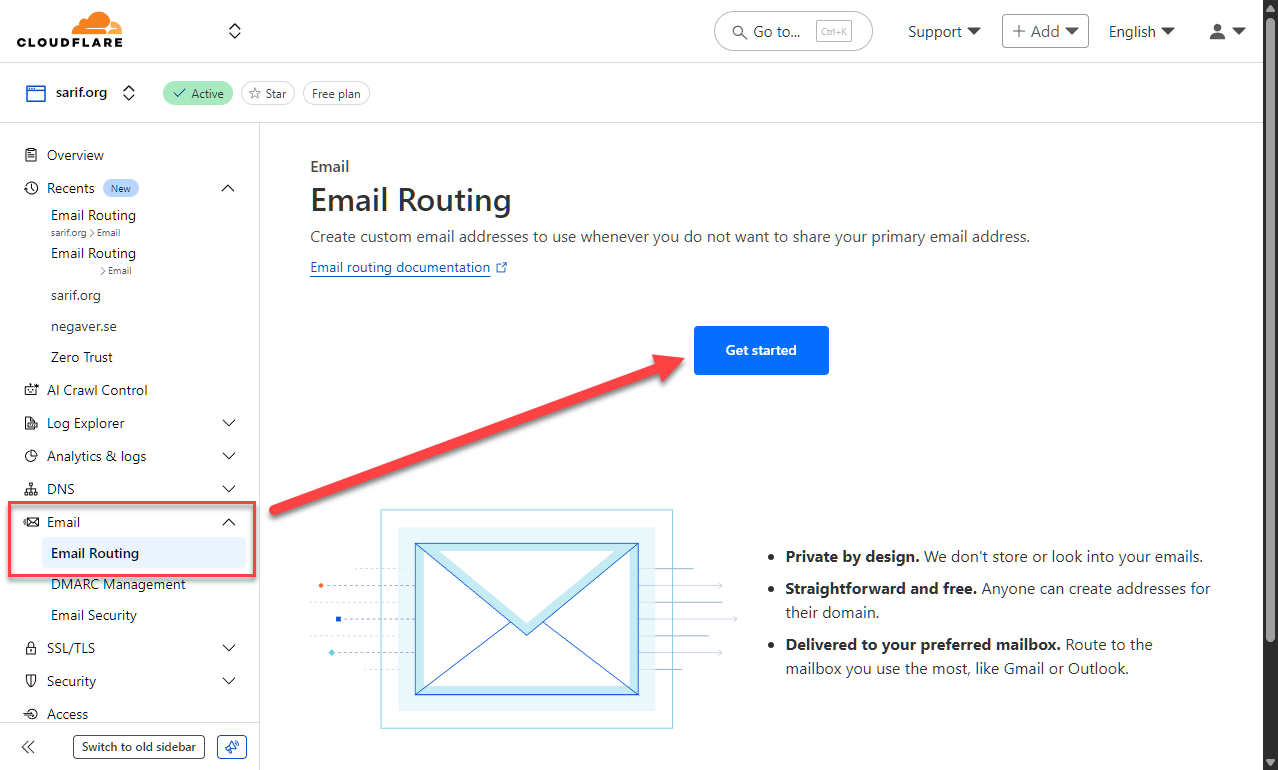
We’ll Skip getting started to go to the configuration page.
First, let’s Enable Email Routing…
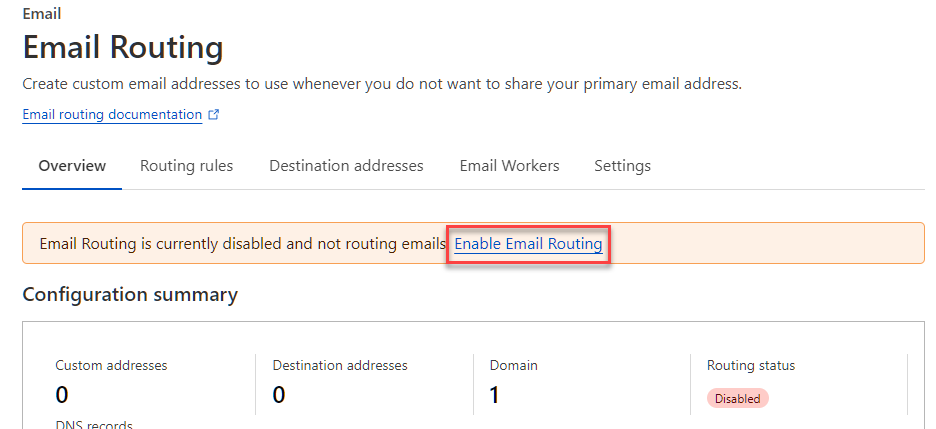
…and then click Add records and enable.
Configure Routing Rules
You can be creative here with how you want to setup your temporary email, or routing rules in general. For now, we’re just going to do a very simply config that will route anything@yourdomain.org to Slack. This means, any address, including:
- dog@yourdomain.org
- volkis@yourdomain.org
- hunter2@yourdomain.org
- askdjfnoisadnfponamsodfniasuhellornoirnasifnsdfnaoisf@yourdomain.org
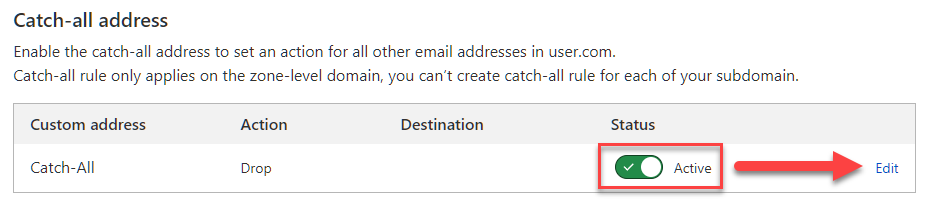
Let’s activate the Catch-All rule, and then edit it:
Change Action to Send to an email, and Destination to the email address associate with your Slack channel. Click Save.
(You can find the Slack channel email here: https://slack.com/intl/en-au/help/articles/206819278-Send-emails-to-Slack. It will depend on your tier)
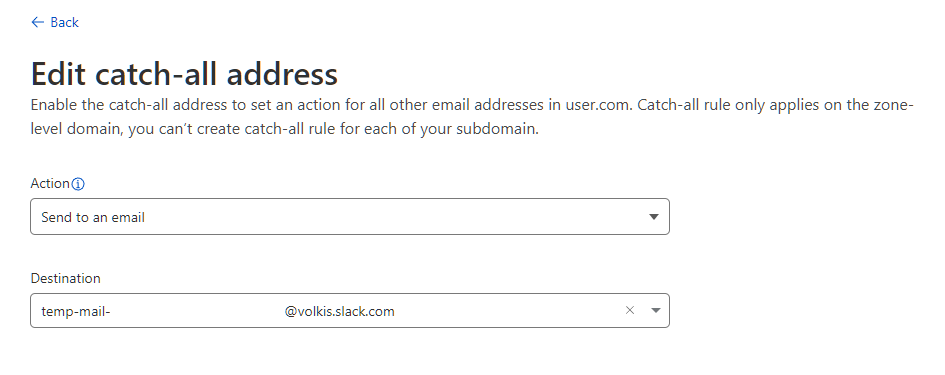
If you’re using another messaging platform that doesn’t have direct email forwarding functionality, you can use Email Workers to convert incoming emails to a web API request. This is a bit outside the scope of this guide, but if you’d like me to do another guide on Email Workers, DM me. Or, just use AI. 😅
Lastly, we need to verify the destination email address. Go to the connected Slack channel to view the verification email and hit *Verity email address.
Putting it to the test
In Cloudflare, verify that the Catch-All rule is still set to Active.
Now, let’s send a test email to dog@yourdomain.org.
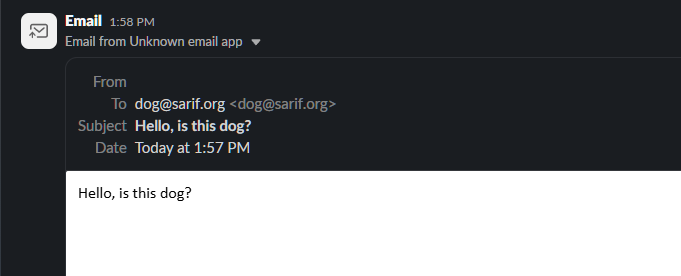
Look at that! You have your very own, shiny, brand new disposable email service.
About the author
Alexei Doudkine is Co-Founder and Offensive Director at Volkis. Hacker, tinkerer, car modder and dog person, Alexei has been in the infosec game for over 10 years focusing on the “attack” side of security. You can catch him on Twitter and LinkedIn.
Photo by Andrey Matveev on Unsplash
If you need help with your security,
get in touch with Volkis.
Follow us on Twitter and
LinkedIn